
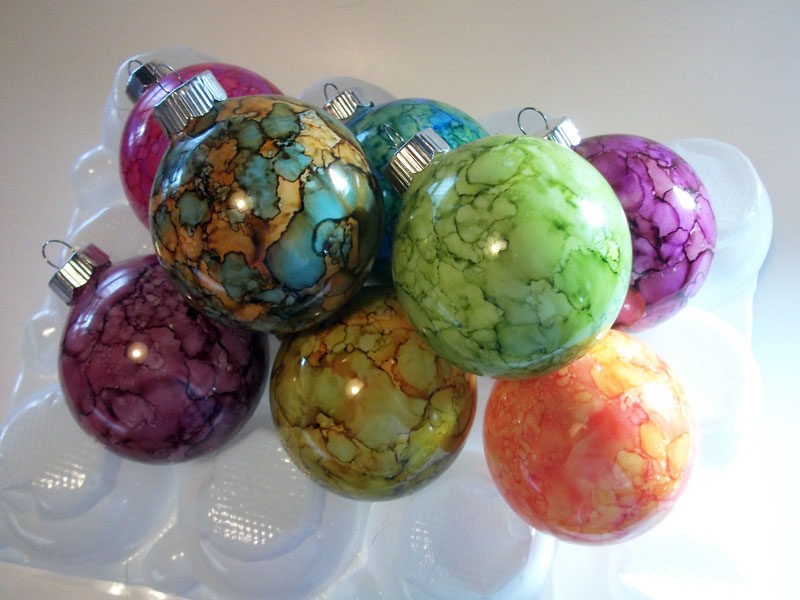
Alcohol Ink Christmas Ornaments
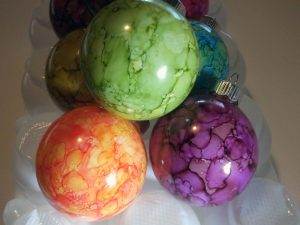
If you’re looking for something a little different this Christmas season, these alcohol ink tree ornaments might do the trick. I experimented with alcohol ink a few months ago and discovered that the product has some very cool properties that enable you to come up with unique results each and every time.
Be aware that alcohol ink is an acid-free, highly pigmented, and fast drying medium used on non-porous surfaces. By mixing various colors you can create vibrant, marbled effects.
If you search the internet, you can find several tutorials that show you step-by-step how to create these unique decorations. The end result depends on your imagination.
I think this young lady has done a great one. THE UNTIDY ARTIST
The best part about making these ornaments is that they are relatively inexpensive and everything you’ll need can be picked up at Jo-Ann’s, Michael’s, or Hobby Lobby.
This is what I used to create my ornaments:
 Glass or plastic Christmas ornaments
Alcohol ink
White acrylic paint
A sheet or two of felt
Plastic cups
A small stamp pad or short wooden dowel rod.
One side of a velcro strip (Optional)
Rubber gloves (Optional)
A few things about the supplies, how they are used, and what to look for.
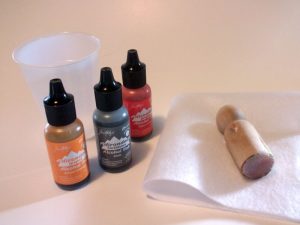
Unfortunately, the alcohol ink comes packaged in sets of three colors, so you can’t specifically pick individual colors. At a minimum, try to buy a few packages so you can get most of the primary colors. These sell for 5 or 6 bucks a pack. Also keep in mind that you can buy special alcohol ink items like thinner and metallic mixatives that will make the ink a little shiny. Joann’s has an entire section of inks and chemicals for distressing different types of media.
The ornaments are your own personal preference. I find that the effects work pretty much identical on glass or plastic ornaments. Plastic is probably the better choice if you have small children or pets.
 Acrylic paint……the kind you can get at Walmart for 50 cents is what I used to coat the inside of the ornaments. You can use a lot of this, so you may want to pick up a few bottles to have on hand.
The plastic cups are important because you will use them to drain the paint as well as use as holders for the ornaments to dry.
You can use an old stamp pad or anything that you can attach a piece of velcro to. The velcro will hold the felt in place when you apply the ink. I found a little bag of wooden ‘lego type’ figures at Hobby Lobby that I glued the velcro to. It is smaller than a traditional stamp pad and it gives me better control when applying the paint.
The process of creating the ornaments is fairly simple.
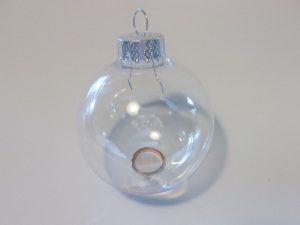
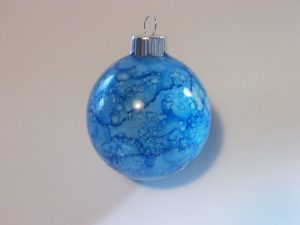
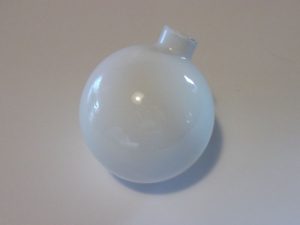 Remove the metal hanger from a clear ornament and fill it with a liberal amount of acrylic paint…….simply swirl it around the inside of the ornament until it is entirely covered. Once covered, place the ornament on the plastic cup with the opening pointing down. It will take a few hours for it to totally drain. (I let mine dry for about 48 hours before doing the actual painting.) The reason I paint the inside is because it allows you to see the vibrant colors of the alcohol ink. If you like, you can apply the ink to a clear ornament….it will give you a stained glass, opaque effect. I’ve also seen people put the ink inside the ornament and distribute it inside by using one of those cans of air used for dusting your electronics.
Once you have your ornaments filled….the fun stuff starts.
You can use rubber gloves if you like, but I have found the ink washes off relatively easy so I don’t.
Take your stamp pad or home-made dobber and attach a piece of felt to the bottom. (Again, velcro is the easiest way to do this.)
Choose two or three complimentary colors of ink and put several drops of each color on the felt. (Yes, you can use more than one color at a time.)
 Then, simply take the ornament and start dabbing it with the felt……do not slide or try to use the applicator as a paint brush. After about 10 seconds, you will begin to see the neat properties of the alcohol ink. If the color isn’t quite right, add more of a different color ink. If you aren’t getting the effect you like, just go over the section as many times as you like until it looks the way you want. I like to call the ink ‘self-correcting’ because if you screw something
 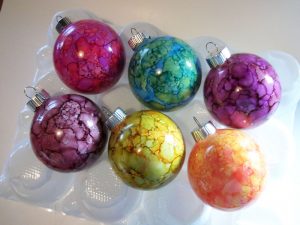 up…..like smearing or an errant fingerprint, dabbing over the mistake makes it disappear. Keep dabbing or ‘stamping’ until the ornament is completely covered. The hardest part of the whole process is knowing when to stop……..no two ornaments will turn out the same. Place the ornament on a plastic cup to dry. (I let mine dry about 24 hours.)
A few things I thought about after creating the original batch of these……
Put a fixative or ‘clear coat’ of lacquer to protect the ornament. I would probably choose a water-based sealant if you choose to do this.
Fill the ornament with a color other than white. There are about a bazillion colors of acrylic paint….try a different one.
 You may want to thin the paint….just don’t make it too thin……you don’t want to be able to see through it.
After draining the ornaments, pour the excess back into the bottle for the next ornament.
If you are crafty or artistic or just like to make cool things, try making a few of these this holiday season. I think you will be really happy with the results. If I can help or if you have any questions, just drop me a line at joe@craftycurmudgeon.com
Merry Christmas!!